changedetection.io: Webpage Monitoring for Patch Management

Part of my job is monitoring updates for many systems that are released monthly. For the most part, patch Tuesday keeps these updates on a pretty consistent schedule. The concerning updates are the out-of-band updates that are released at anytime, on a as-needed basis, usually to patch a critical process that's broken due to the update or a critical vulnerability that needs to be patched. Reading the news and multiple cyber blogs does fill this need somewhat but checking each product website daily for these updates is just not feasible.
I wanted something to monitor the sites where companies post their product updates and critical vulnerability patches to let me know when I needed to patch my own systems, intended for sites that don't currently have their own option for mailing lists or subscriptions options. That's where I found changedetection.io, a free website page monitoring tool that can be selfhosted and supports custom trigger notifications via Discord, Email, Slack, O365, etc. This tool is mainly suited for watching prices of online products and when certain items become in stock for products being sold online, but this tools fills my need for monitoring website changes for patch updates.

Installing changedetection.io
For installation, changedetection.io offers three main options: Docker, Windows, or Linux via Pip. I will be using Linux to selfhost this but the other installation options can be viewed on their official GitHub Page.
- Download and install an instance of Debian. For this tutorial, I am using Debian 12-Bookworm.
- Install pipx with the following commands. The install command will install the pipx dependencies as well.
sudo apt-get update
sudo apt-get install pipx- Install changedetection.io using pip3
pipx install changedetection.io
sudo mkdir /var/www/changedetection.io
changedetection.io -d /var/www/changedetection.io -p 5000- Once installed, open a web browser and navigate to the following site http://<IP of Debian Server>:5000 to ensure it is working.
- Now we want to create it as a service using SystemCtl so that it will start at boot. Use the following command to create the service file that we will use.
sudo touch /etc/systemd/system/changedetector.service- Now that the file is created, edit it using nano.
sudo nano /etc/systemd/system/changedetector.serviceInside of the file you will put the following, make sure to change the <user> with the user that you installed changedetector as.
[Unit]
Description=Change Detection
After=network.target

[Service]
Type=simple
Restart=always
user=<user>
ExecStart=/home/<user>/.local/bin/changedetection.io -d /var/www/changedetection.io -p 5000

[Install]
WantedBy=default.target- Using systemctl, we are going to start the service and make sure there are no errors
sudo systemctl daemon-reload
sudo systemctl start changedetector
- To check if there are errors use: journalctl -u changedetector.service
- If there are no errors, you can enable the service so that it will start on boot
sudo systemctl enable changedetectorNow reboot the system and ensure that changedetector starts correctly.
Configuring changedetection.io
There are multiple different ways to configure this tool, in this instance I will be setting up email notifications. This tool uses the AppRise Python library to send notifications, so you can use any notification supported by AppRise.
Examples:
- Discord - discord://webhook_id/webhook_token
- Gitter - gitter://token/room
- Home Assistant - hassio://hostname/accesstoken
- Mailgun - mailgun://user@hostname/apikey
- Microsoft Teams - msteams://TokenA/TokenB/TokenC/
- This one seems to be being deprecated. Will update here when workflow guidance with AppRise is updated.
- OneSignal - onesignal://AppID@APIKey/PlayerID
- Telegram - tgram://bottoken/ChatID
Setting up Email Notifications
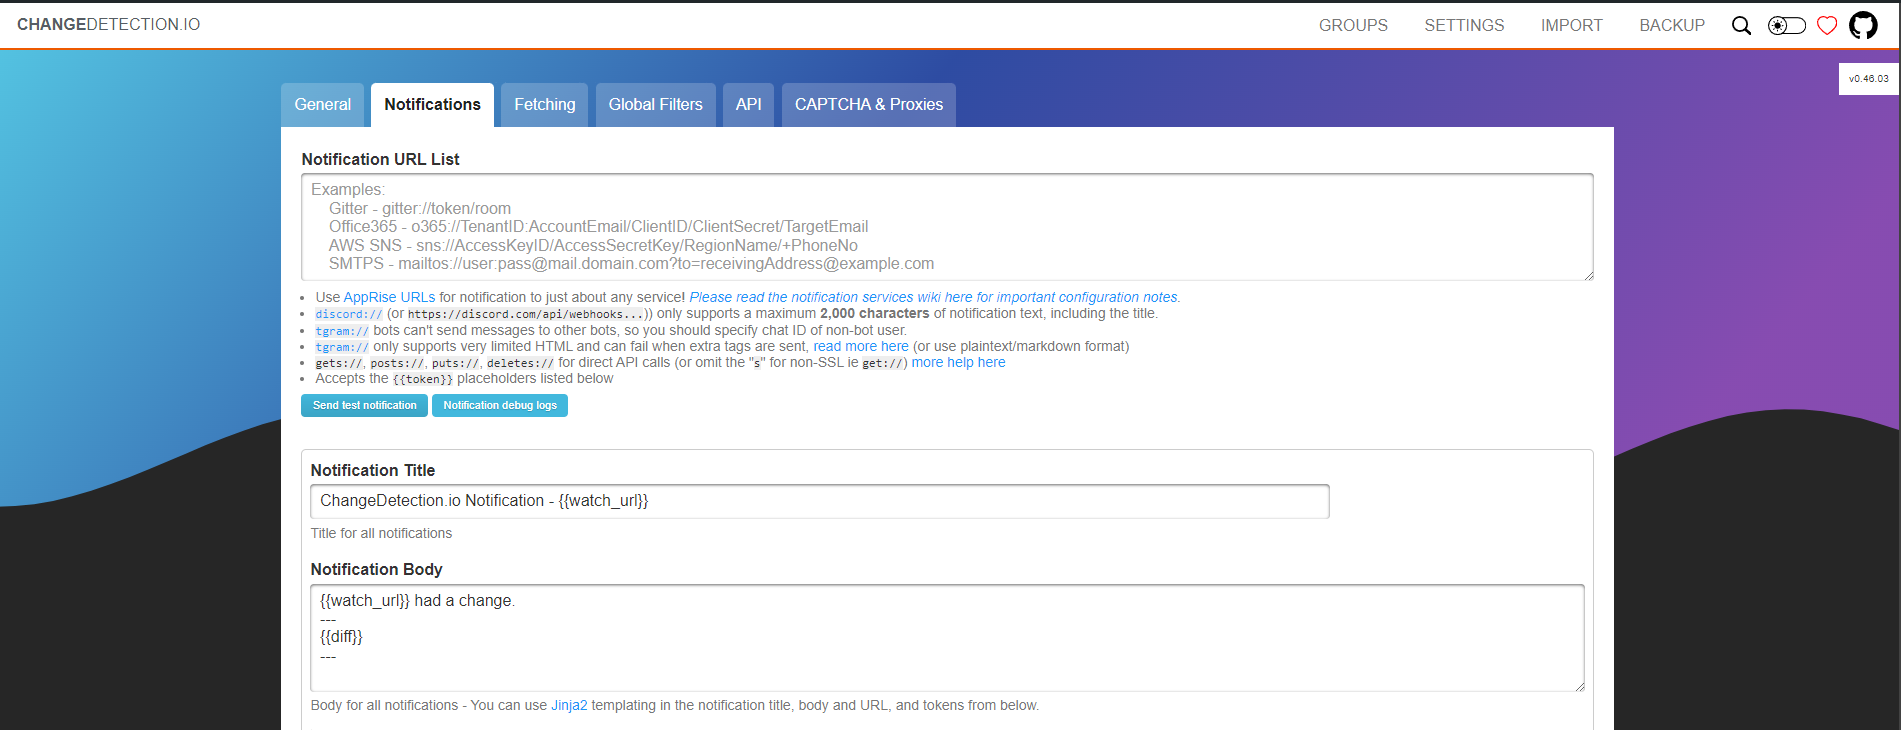
- In the changedetection.io webpage, navigate to the "Notifications" tab

- In the Notification URL List, type in the following for SMTPS configuration. (We are using Gmail but you can use any email service that has SMTPS support)
- SMTPS - mailtos://username:[email protected][email protected]
- Once configured, save the settings and then click "Send test notification"
- If there are any issues and you don't receive a notification, you can select "Notification debug logs" to see what errors there is.
- You can keep the default Notification Template, or adjust it to your needs. It uses Jinja 2 templating, which you can reference here.
- Make sure to save once you are done editing your template.
Monitoring Patch Update Websites
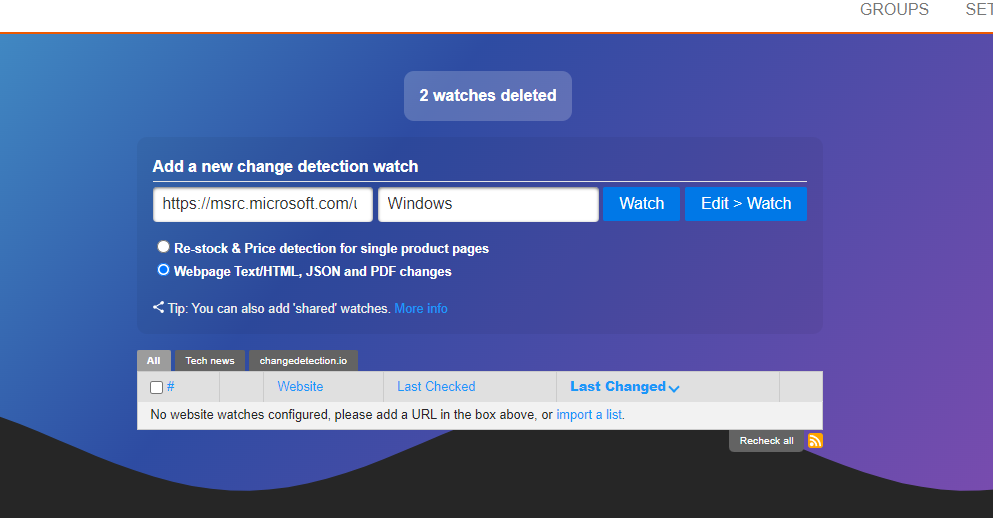
- To add a website, start by navigating to the homepage.
- Add the URL in, the URL section and create a label/tag to help better track any sites you are monitoring

- Click Edit > Watch and type in a Title for the site and change any settings that you would like on this page. Then click save.
- You will now receive notifications anytime the website updates. If you find you are getting too many updates for things that don't pertain to the patches updates, you can make it more granular on what it monitors using filters & triggers section under Edit.
References

